How to create an Outlook Distribution List
Distribution lists, also known as mailing lists, are customized
lists of contacts that are used for mass email addressing purposes
(for example, a list of customers that are sent a monthly
newsletter). Distribution lists are most convenient if you send an
email to the same list of people frequently. Instead of adding
individual email addresses one at a time to send an email to a lot
of people, simply create a distribution list.
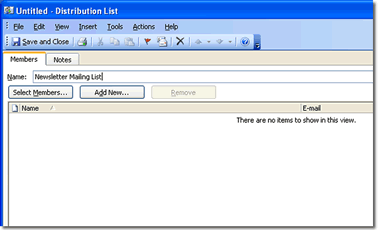
- In the Menu bar under File, select New and choose Distribution List from the drop-down menu.
- Name the distribution list in the box beside Name. This is the name you will use to address the email message(s) that will contain all the email addresses in it.

- To add email addresses to the distribution list, click on Select Members. Select the contact source you would like the email addresses to come from, and highlight the desired email addresses. You can do this either one at a time, or by holding down the Shift or Ctrl key and selecting multiple contacts a time. Then click Members below the highlighted contacts to add them, and click Okay when you're finished.

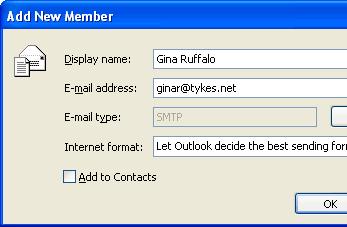
- You may also add email addresses that are not in your Outlook address book or contacts. To do this, click on Add New in the distribution list dialog box.
- Type in a Display name and Email address for the contact and click Okay. You can also add this contact to your Outlook contacts by clicking on the corresponding checkbox.

- To add other members, follow steps 4 and 5 for each additional contact name.
- After all members have been added, click on Save and Close. Your distribution list is now ready!
After creating your distribution list, you can send it to a coworker or colleague so that they can use the same distribution list. To forward your distribution list, open the distribution list under your Contacts folder. In the Menu bar under Actions, click Forward in the drop-down menu. A new email message will be created with the distribution list as an attachment. Address and compose the email message and send.


